
Friday, 26 October 2018
Friday Post - October 26 - Premiere Pro - Dynamic Systems
Thursday, 18 October 2018
Video Editing - Slideshow - Basic
First Slideshow
I first gathered 10 images, but in my case 9 images and a gif, then I imported them into the project. I changed the duration of the photos before dragging them onto the timeline. When I wanted to add effects to a certain image I would click on the image then go to the toolbar above and go to editing/effects. I also used key frames to make the images change positions, or scale. And then I added music last.
Second Slideshow
For this slideshow I just followed the first tutorial above, with the exception of adding more images. This time for the music though, since I had to transition between it, I went to audio transitions options in the effects bar. I picked the fade option and dragged the transition and dragged it in between my two audio clips. And I used keyframes to animate the text and images. I also used the option 'Video Transitions' in the effects bar, and dragged the transition in between the clips that I want to transition it to. This also worked the same on text (graphics) Other than those small differences, everything else from this video was based off of the first tutorial.
Friday, 12 October 2018
Friday Post - October 12, 2018 - Photoshop Tutorials
The photos I used were...


I created...
An alien inside a mirror portal looking at out at the fire.


First, I added the background first and left it there. Then I added the picture of the alien and cropped him out from his background using the quick selection tool [W] After I have the alien selection highlighted, I right click and click on the option layer via copy, which made a new layer of my cutout. Since the cut wasn't 100% accurate, I used the brush tool [B] to clean it up a bit. After that, I added the mirror in, and used the transform tool [CTRL + T] to place it into the fire. I then dragged every layer under the background layer because I changed the background to 'Screen' settings, which made everything blend together. Since the alien in the original image only had half of his body showing, it didn't fully fit the mirror so I selected the bottom part of mirror, which had half of his body missing, I used the 'Polygonal Lasso Tool' to select it, then I went into the toolbar at the very top and went to Edit > Fill > Content-Aware > Ok. The last part I just added my blog address above the background layer so it doesn't blend into the background like the other layers.
Thursday, 11 October 2018
Photoshop - 3 Tutorials
3D Effect in Photoshop CC
Tutorial:

MY VERSIONS:


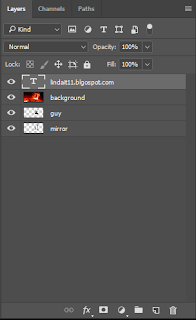
1st image layers

2nd image layers

3rd image layers

Subscribe to:
Posts (Atom)