Friday, 12 October 2018

Friday Post - October 12, 2018 - Photoshop Tutorials

The photos I used were...



I created...

An alien inside a mirror portal looking at out at the fire.
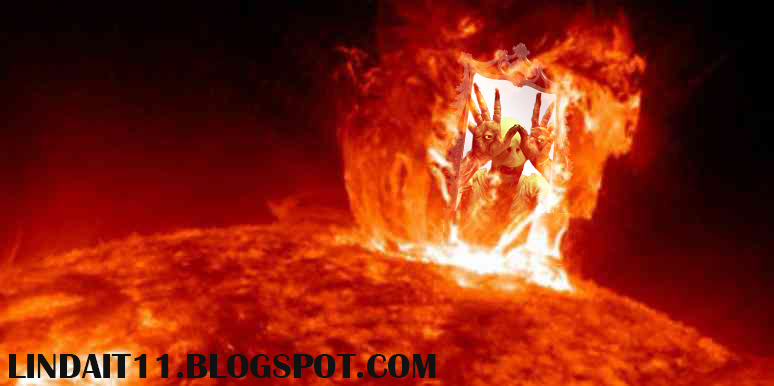


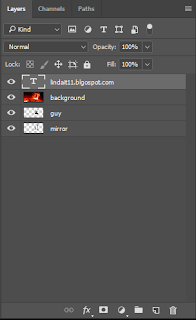
First, I added the background first and left it there. Then I added the picture of the alien and cropped him out from his background using the quick selection tool [W] After I have the alien selection highlighted, I right click and click on the option layer via copy, which made a new layer of my cutout.  Since the cut wasn't 100% accurate, I used the brush tool [B] to clean it up a bit. After that, I added the mirror in, and used the transform tool [CTRL + T] to place it into the fire. I then dragged every layer under the background layer because I changed the background to 'Screen' settings, which made everything blend together. Since the alien in the original image only had half of his body showing, it didn't fully fit the mirror so I selected the bottom part of mirror, which had half of his body missing, I used the 'Polygonal Lasso Tool' to select it, then I went into the toolbar at the very top and went to Edit > Fill > Content-Aware > Ok. The last part I just added my blog address above the background layer so it doesn't blend into the background like the other layers.


Thursday, 11 October 2018

Photoshop - 3 Tutorials

3D Effect in Photoshop CC


Tutorial:


MY VERSIONS:


1st image layers


2nd image layers


3rd image layers


Friday, 28 September 2018

Friday Post - September 28, 2018

FRIDAY POST SEPTEMBER 28, 2018


MY BLOG APP

- Thunkable is an app-building program that allows you to develop apps without needing the knowledge of programming. I have done the tutorials from the beginning and started doing the intermediate apps, I left off at finishing the third intermediate app. So far I completed button changes, photo sharing, and screen navigation. In my opinion thunkable is okay, personally I would prefer doing actual coding so I can learn and use it in the future. But I like this because it's pretty simple and self explanatory from the blocks/pictures. And I feel like using thunkable is somewhat limited compared to ACTUAL programming.

Thursday, 20 September 2018

Friday, 14 September 2018

Friday Post, September 14

1. 6 Shortcuts

- CTRL A = Selects everything/highlights it
- CTRL C = COPIES SOMETHING
- CTRL V = PASTES WHAT YOU COPIED
- CTRL ALT AND DRAG = DUPLICATES A LAYER
- SHIFT CTRL N = NEW LAYER
- CTRL T = TRANSFORM TOOL FOR CROPPING AND ROTATING


2. Octopus

1. In order to remove the background from the octopus, I first selected the octopus with the tool with the quick selection tool [W].

2. Then I right click the outlined image with my mouse, and clicked on the option 'Layer Via Cut' That option will make a new layer of what you outlined. After that I just deleted the original photo, and was left with the layer of my outlined copy.

3. I used the Eraser Tool [E] to zoom in on the pixels and erase the unnecessary parts, like the tree/branches, to make it look cleaner.

4. After that I had to do 'Layer Via Cut' again but this time for, the octopus legs because they were apart from each other, so I used that to transform [CTRL T] each leg onto the octopus.

5. Final step to make it look a bit more cleaner, I used the eyedrop tool [I] to copy the color on the octopus, then I used the brush tool [B] to paste that color where I needed.


3. Photo Manipulation Effect


Wednesday, 12 September 2018

Infograph

Infograph

1. What is an infograph?


-An Infograph is a visual representation displaying data utilizing either charts or diagrams.


2. 4 Examples (in a table)


4 Examples of Infographs


3.  Create your own - Use photoshop


1st Infograph - 'This is Me... working towards my future'


2nd Infograph - 'How to manage school life'


3rd Infograph - 'How to protect your bitcoins'